The compresor pe o unitate centrală de aer condiționat se află în unitatea exterioară - dulapul mare din metal care se află în afara casei dvs. - și se găsește de obicei în partea de jos sau în centrul acelui dulap, încadrat într-o carcasă metalică cilindrică sau în formă de cupolă. La unitățile de curent alternativ cu ferestre și sistemele mini-split, compresorul este, de asemenea, găzduit în componenta orientată spre exterior sau exterioară. Înțelegerea exactă a locului în care se află compresorul, cum arată și ce face este primul pas către diagnosticarea problemelor, programarea întreținerii și luarea unor decizii inteligente de reparații.
Unde este compresorul de pe o unitate de curent alternativ - după tipul de sistem
Locația exactă a compresorului depinde de tipul de sistem de aer condiționat pe care îl aveți, dar, în fiecare caz, compresorul locuiește în partea sistemului care este expusă aerului exterior sau aerului ambiant - niciodată în unitatea interioară de tratare a aerului sau în unitatea de evaporare. Iată unde să-l găsiți pe fiecare tip major de sistem AC:
Aparate de aer condiționat cu sistem centralizat (cel mai comun AC pentru casă)
Într-un sistem central split - tipul cu un dispozitiv de tratare a aerului de interior și un dulap exterior separat - compresorul este situat în interiorul unității de condensare exterioară . Căutați cutia mare de metal (de obicei, 24 până la 36 inci lățime și 24 până la 40 inci înălțime) așezată pe un suport de beton sau suporturi de montare în afara casei dvs., de obicei lângă casă sau în spatele acesteia. Când priviți în jos în unitatea exterioară de pe grila de sus, veți vedea paleta ventilatorului. Compresorul se află sub acel ventilator, în partea centrală inferioară a dulapului. Este cea mai mare componentă din interiorul unității exterioare și este conectată la două linii de agent frigorific - linia de aspirație izolată mai mare și linia de lichid mai mică.
Unități de aer condiționat cu ferestre
Într-o unitate AC cu fereastră, atât secțiunile evaporatorului (interioare) cât și condensatorului (exterior) sunt încorporate într-un singur șasiu. Compresorul este situat în jumătatea exterioară a unității de fereastră - porțiunea din spate care iese în afara ferestrei. Se află lângă partea de jos a șasiului, lângă bobinele condensatorului și ventilatorul condensatorului. Deoarece întreaga unitate este autonomă, compresorul dintr-o fereastră AC este mai compact decât în sistemele centrale, cântărind de obicei 5 până la 15 lire sterline, în funcție de ratingul BTU al unității.
Aer condiționat mini-split (fără conducte).
Sistemele mini-split au o unitate principală interioară montată pe perete și o unitate exterioară separată conectată prin linii de agent frigorific. La fel ca sistemele centrale split, compresorul într-un mini-split este situat în întregime în unitatea exterioară. Unitățile exterioare mini-split sunt mai compacte decât unitățile exterioare centrale de curent alternativ – de obicei cu lățime de 12 până la 24 inchi și înălțime de 20 până la 30 inchi – dar compresorul din interior urmează aceeași poziție: în centrul de jos al dulapului exterior, sub ventilatorul condensatorului și bobinele.
Unități de AC ambalate (unități de pe acoperiș)
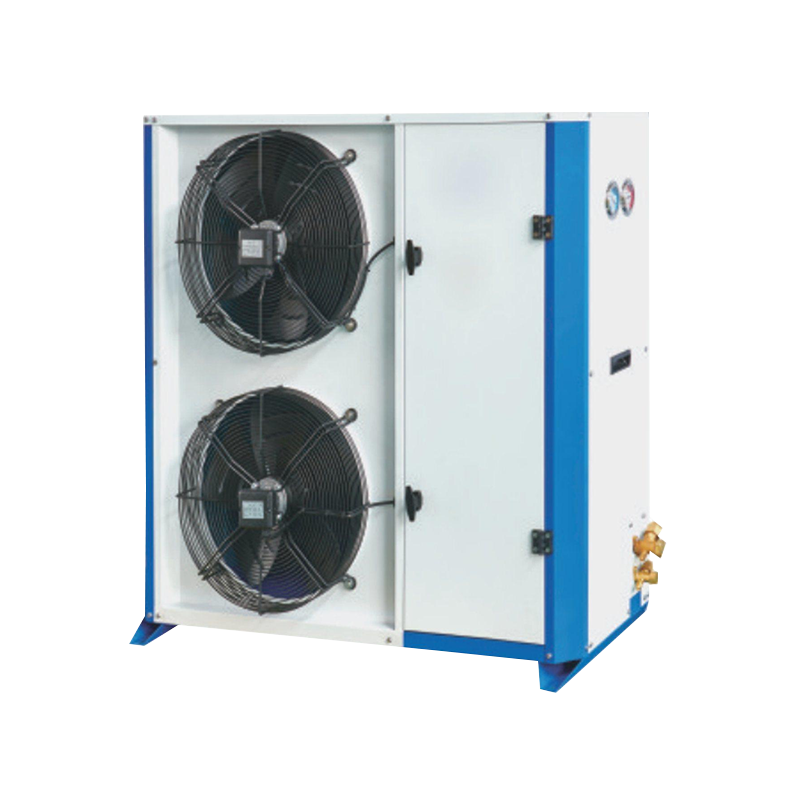
Unitățile de curent alternativ împachetate combină toate componentele - evaporator, condensator și compresor - într-un singur dulap, care este de obicei instalat pe acoperișul clădirilor comerciale sau pe un suport de la nivelul solului pentru unele case. Într-o unitate ambalată, compresorul este găzduit într-un singur dulap exterior, de obicei în secțiunea condensatorului unității. Acestea sunt frecvente în clădirile comerciale, hoteluri și locuințe multifamiliale, unde spațiul din interiorul clădirii este limitat.
| Tip sistem AC | Unde să găsești compresorul | Detalii despre locația compresorului |
| Sistem central split | Unitate de condensare exterioară | Centrul de jos al dulapului exterior, sub ventilator |
| Unitate de climatizare pentru fereastră | Jumătate din spate (exterior) a șasiului | Aproape de jos, lângă bobinele condensatorului |
| Mini-Split (fără conducte) | Doar unitatea exterioară | Centrul de jos al unității exterioare, sub ventilatorul condensatorului |
| Ambalat / Unitate pe acoperiș | Dulap unic de exterior (pe acoperiș sau la sol) | Secțiunea condensatorului cabinetului combinat |
Tabelul 1: Locația compresorului AC în funcție de tipul de sistem, care arată unde să căutați compresorul pentru fiecare configurație majoră de aer condiționat.
Cum arată compresorul de curent alternativ și cum să-l identifici
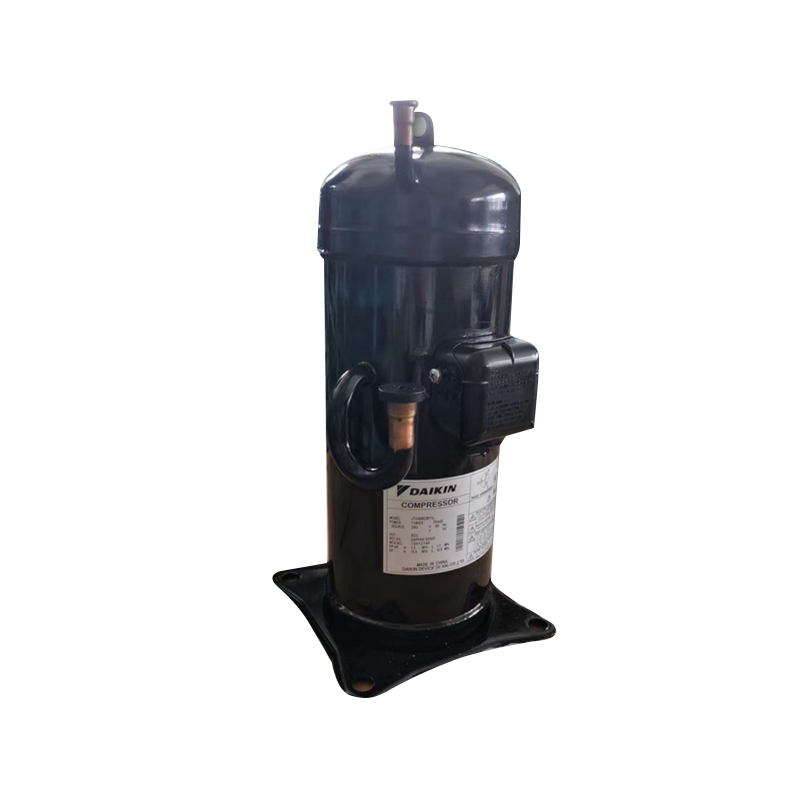
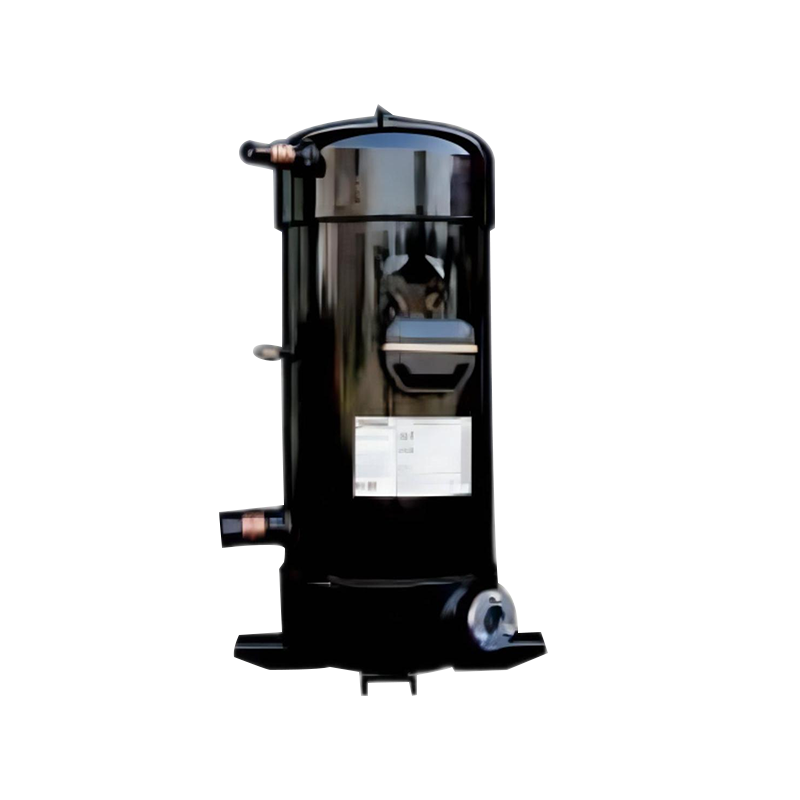
Compresorul AC este un recipient metalic etanș, cilindric sau în formă de cupolă, de obicei negru sau gri închis, aproximativ de dimensiunea și forma unui recipient mare de vopsea sau a unui mic stingător de incendiu - și este aproape întotdeauna cea mai puternică și mai grea componentă din interiorul unității exterioare.
Iată caracteristicile vizuale și fizice care identifică compresorul:
- Forma: Compresoarele închise ermetic – tipul folosit practic în toate unitățile de curent alternativ rezidențiale și comerciale ușoare – au o formă netedă, rotunjită de cupolă sau cilindru. Carcasa este complet etanșată, fără părți în mișcare vizibile la exterior. Compresoarele scroll (din ce în ce mai frecvente în sistemele moderne) tind să fie mai înalte și mai cilindrice; compresoarele cu piston sunt mai rotunde și mai scurte.
- Dimensiune: În sistemele rezidențiale de curent alternativ, compresorul măsoară de obicei 12 până la 18 inchi în diametru și 12 până la 24 inci în înălțime. Cântărește între 20 și 60 de lire sterline, în funcție de capacitatea de răcire a sistemului (măsurată în tone - un sistem rezidențial de 3 tone are de obicei un compresor care cântărește 30 până la 45 de lire sterline).
- Culoare: Majoritatea compresoarelor de curent alternativ rezidențiale au un exterior de metal gri închis, negru mat sau ocazional argintiu. Suprafața este de obicei simplă și neizolată, deși unele compresoare au o pătură fonică sau o înveliș izolator din spumă în jurul porțiunii inferioare.
- Conexiuni: Două linii de agent frigorific se conectează la porturile de pe carcasa compresorului - linia de cupru izolată cu diametru mai mare (conducta de aspirație, care transportă vapori de agent frigorific de joasă presiune din evaporator) și linia de cupru mai mică (linia de descărcare, care transportă agent frigorific fierbinte de înaltă presiune la serpentina condensatorului). O conductă electrică se conectează și la blocul de borne al compresorului.
- Vibrații și sunet: Când sistemul de curent alternativ funcționează, compresorul vibrează și produce un zgomot constant și scăzut. Este montat pe manșe de izolare din cauciuc pentru a reduce transferul vibrațiilor către carcasă. Această vibrație și bâzâit - care se disting de sunetul înalt al ventilatorului condensatorului - este o modalitate de a confirma care componentă este compresorul atunci când sistemul funcționează.
Ce face compresorul în interiorul unui sistem de aer condiționat
Compresorul AC este inima ciclului de refrigerare - comprimă vaporii de agent frigorific de joasă presiune în gaz de înaltă presiune și temperatură înaltă, care este pasul esențial care permite întregului sistem să transfere căldura din interiorul casei în exteriorul acesteia.
Ciclul de refrigerare funcționează după cum urmează: agentul frigorific absoarbe căldură din aerul din interior pe măsură ce se evaporă în serpentina evaporatorului interior, transformându-se dintr-un lichid într-un vapor de joasă presiune. Acești vapori caldi călătoresc prin conducta de aspirație către unitatea exterioară, unde compresorul îl strânge sub presiune ridicată - ridicându-și temperatura și mai mult, la 120 până la 160 de grade Fahrenheit sau mai mult. Acest gaz fierbinte, de înaltă presiune, curge apoi prin serpentina condensatorului, unde ventilatorul exterior suflă aer prin serpentină, iar căldura este eliberată în aerul exterior. Agentul frigorific acum răcit se condensează înapoi în lichid și se întoarce în interior pentru a repeta ciclul.
Fără un compresor funcțional, nu are loc nicio mișcare a agentului frigorific, nu are loc transferul de căldură, iar sistemul AC nu produce răcire. Acesta este motivul pentru care compresorul este adesea numit cea mai critică și cea mai scumpă componentă din orice sistem de aer condiționat. Costurile de înlocuire pentru un compresor AC rezidențial variază de la 800 $ până la 2.800 $ inclusiv forța de muncă , în timp ce înlocuirea întregii unități exterioare rulează de obicei între 1.500 USD și 4.500 USD.
Tipuri de compresoare de curent alternativ și cum diferă
| Tip compresor | Cum funcționează | Aplicație comună | Avantaj cheie |
| Scroll Compresor | Două volute spiralate interconectate comprimă agentul frigorific | AC central rezidential modern si comercial usor | Mai silențios, mai eficient, mai puține părți mobile |
| Compresor alternativ (piston). | Pistoanele antrenate de arborele cotit comprimă agentul frigorific | Sisteme rezidențiale mai vechi, unele unități comerciale | Simplu, reparabil, disponibil pe scară largă |
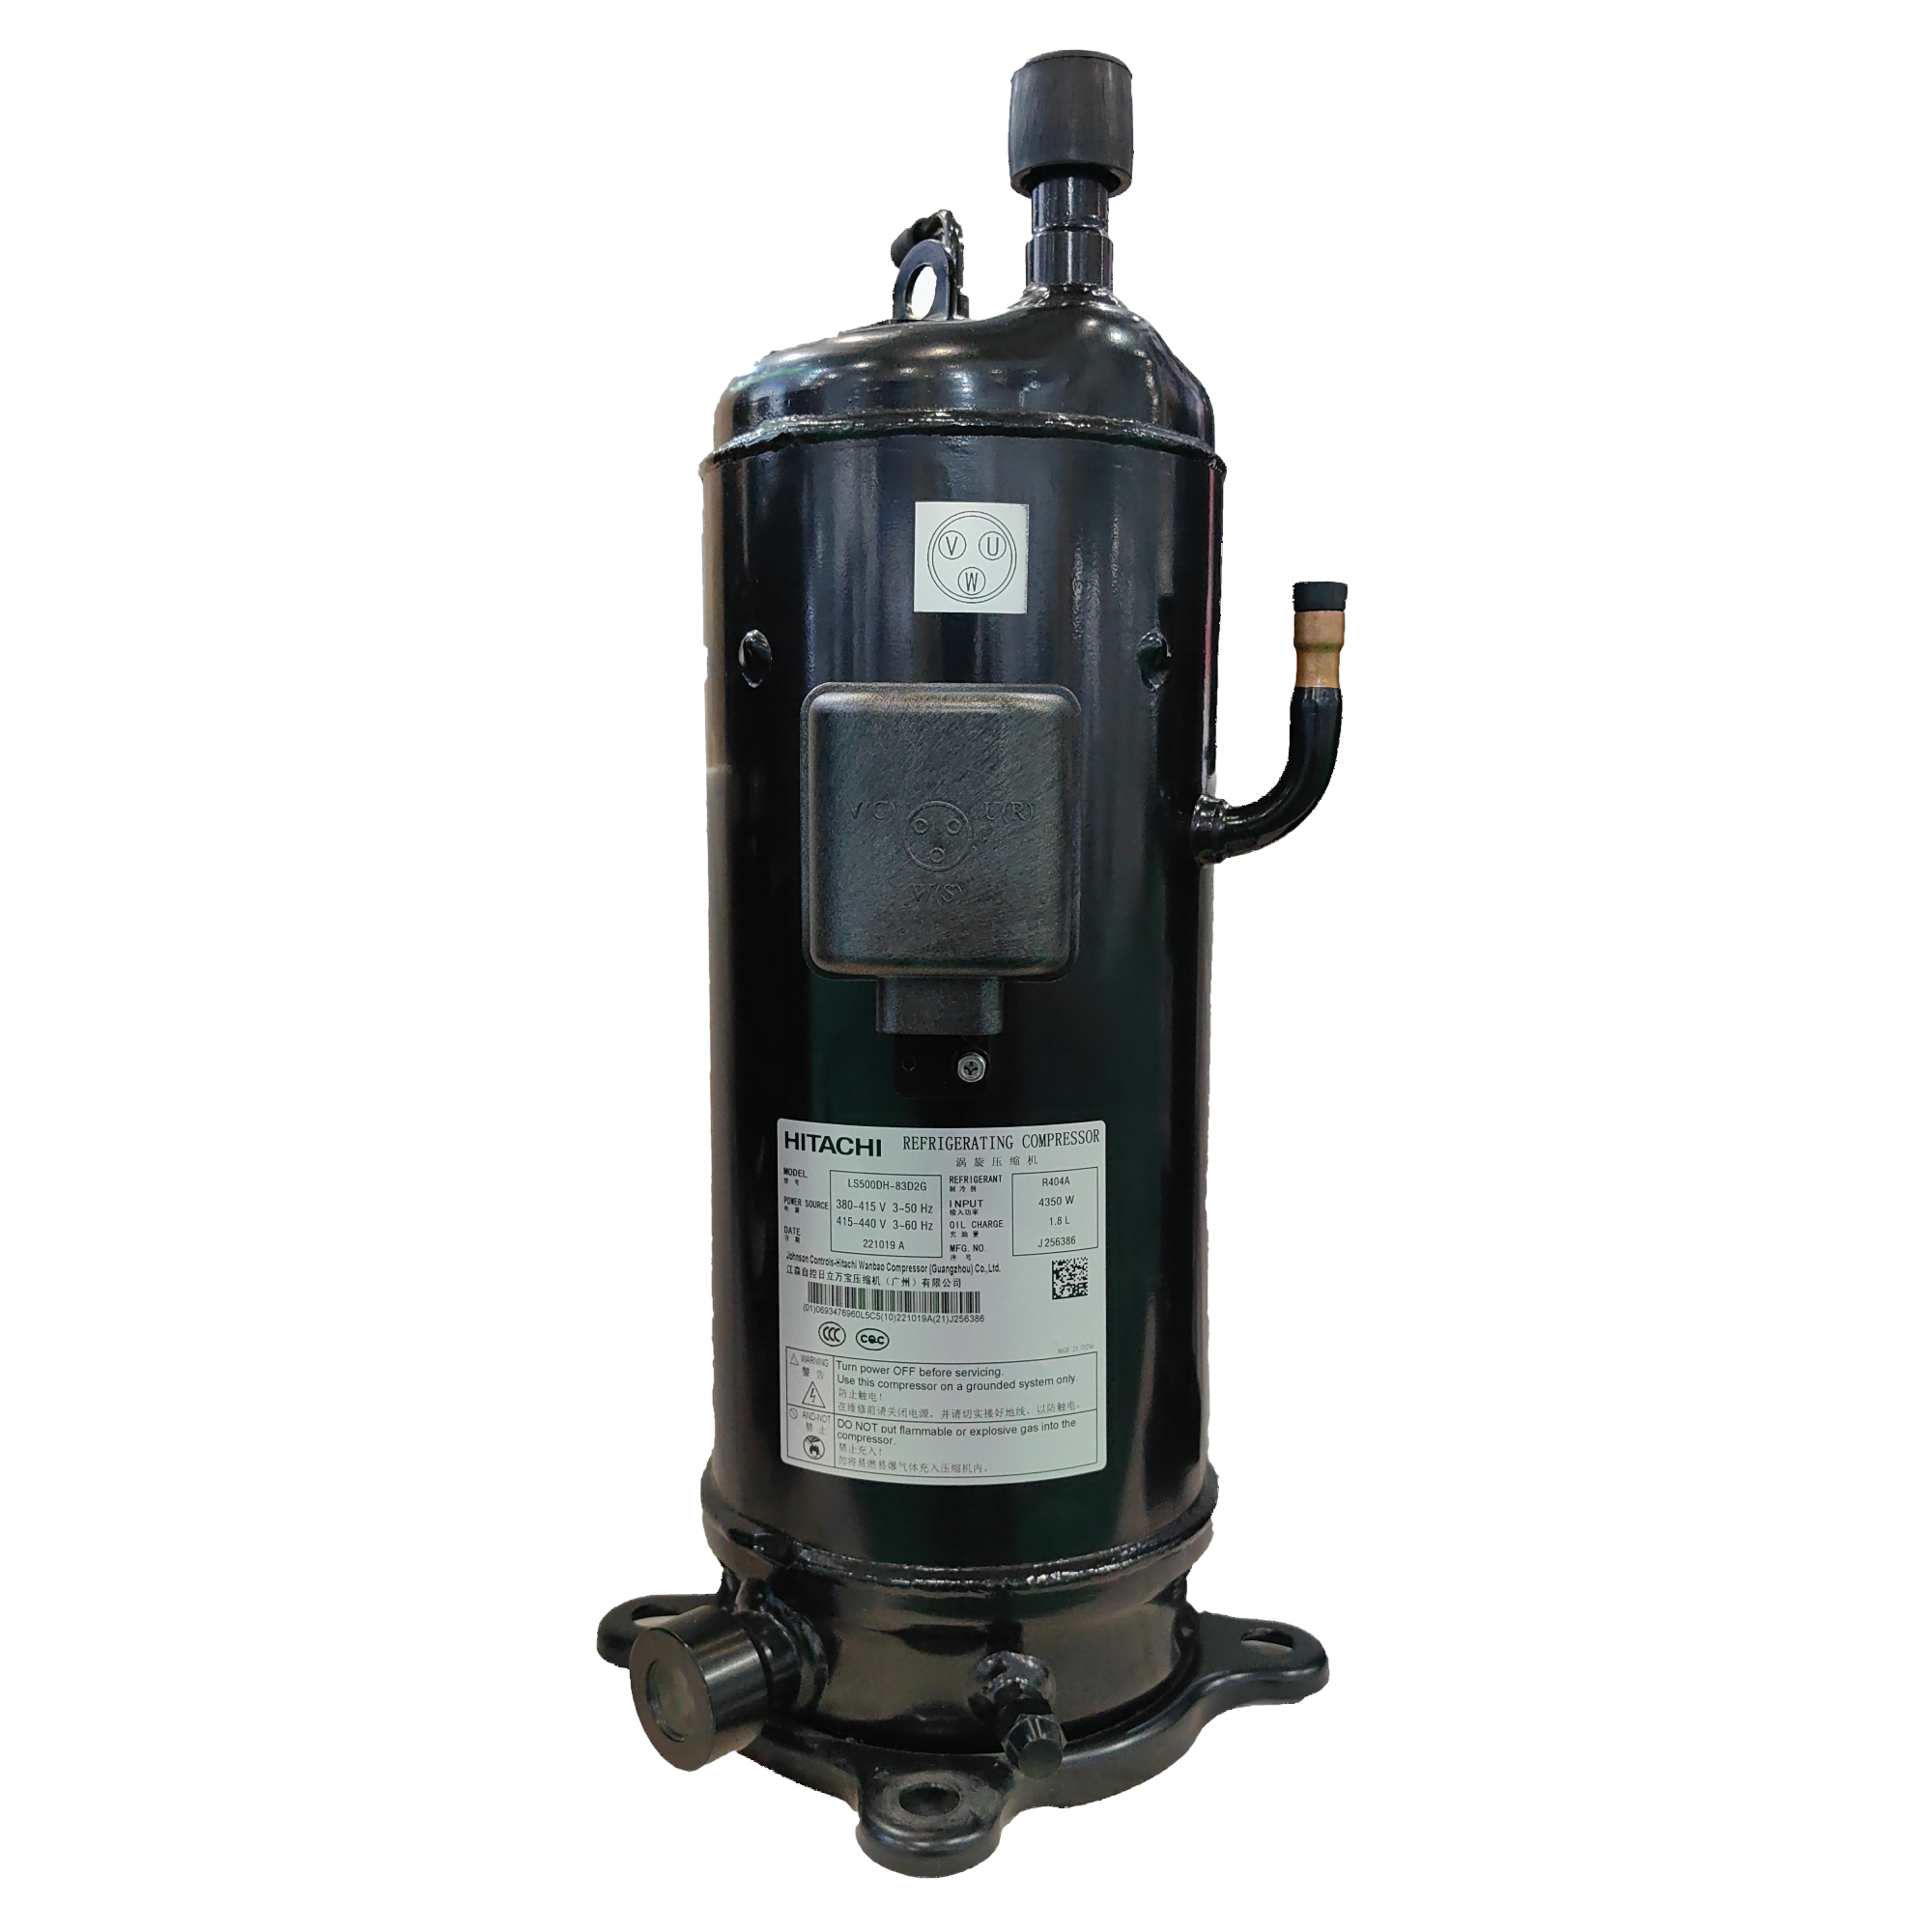
| Compresor rotativ | Lama rotativă mătură și comprimă agentul frigorific | Unități de AC cu fereastră, mini-splituri mai mici | Compact, ușor, cu vibrații reduse |
| Compresor cu viteză variabilă (invertor). | Scroll sau rotativ cu motor de antrenare cu frecvență variabilă | Mini-splituri de înaltă eficiență, AC central premium | Cu 20–40% mai eficient din punct de vedere energetic, control precis al temperaturii |
Tabelul 2: Cele patru tipuri principale de compresoare AC, cum funcționează fiecare, unde se găsesc și avantajele lor cheie.
Ce înconjoară compresorul din unitatea exterioară de curent alternativ
Înțelegerea celorlalte componente din interiorul unității exterioare vă ajută să identificați corect compresorul și să înțelegeți de ce fiecare parte trebuie să funcționeze împreună pentru ca sistemul AC să se răcească eficient.
- Bobina condensatorului: Bobina mare în formă de U sau înfăşurată din tuburi de cupru sau aluminiu cu aripioare metalice care înconjoară interiorul dulapului unităţii exterioare. Refrigerantul fierbinte din compresor curge prin această bobină, iar ventilatorul exterior suflă aer prin aripioare pentru a disipa căldura. Bobina condensatorului este ceea ce vedeți când priviți prin părțile laterale ale unității exterioare - o rețea densă de aripioare subțiri de metal.
- Ventilator și motor condensator: Situat în partea de sus a unității exterioare, ventilatorul trage aerul în sus prin serpentina condensatorului și îl elimină din grila superioară. Motorul ventilatorului este montat în centrul grilei superioare. Puteți vedea paleta ventilatorului când priviți în jos prin grila de protecție din partea de sus a unității. Ventilatorul funcționează ori de câte ori funcționează compresorul.
- Condensator(i): O componentă cilindrică (sau două separate) montată de obicei pe panoul lateral din interiorul unității exterioare. Condensatorul oferă impulsul electric de pornire și de funcționare de care au nevoie compresorul și motoarele ventilatorului. Este unul dintre cele mai frecvente puncte de defecțiune în unitățile exterioare mai vechi, iar un condensator de funcționare defectuos va împiedica adesea pornirea compresorului, chiar dacă compresorul în sine este sănătos.
- Contactor: Un comutator acționat electric în interiorul unității exterioare care controlează furnizarea de energie către compresor și ventilatorul condensatorului. Când termostatul solicită răcire, dispozitivul de tratare a aerului din interior trimite un semnal de 24 de volți la contactor, care apoi își închide contactele și permite curentului de 240 de volți să circule către compresor și ventilator.
- Linii de agent frigorific: Două linii de cupru conectează unitatea exterioară la serpentina interioară a evaporatorului. Linia izolată mai mare (conducta de aspirație, de obicei cu un diametru de 3/4 inch până la 7/8 inch) transportă vapori rece de refrigerant de joasă presiune de la serpentina interioară la compresor. Linia mai mică neizolată (linia de lichid, de obicei cu diametrul de 3/8 inchi) transportă agentul frigorific lichid de la serpentina condensatorului înapoi la dispozitivul de expansiune din interior. Ambele se conectează direct la porturile de pe carcasa compresorului.
- Caseta de deconectare: O cutie metalică montată pe peretele exterior lângă unitatea exterioară care conține o siguranță sau un întrerupător care permite întreruperea în siguranță a alimentării unității exterioare pentru întreținere. Aceasta nu se află în interiorul unității exterioare în sine, ci este direct adiacent acesteia.
Cum să știți dacă compresorul de curent alternativ se defectează
Un compresor de curent alternativ defect produce un set distinct de semne de avertizare care, atunci când sunt prinse mai devreme, pot preveni defecțiunea completă a sistemului și pot reduce semnificativ costurile de reparație. Iată care sunt cele mai importante simptome la care trebuie să fiți atenți:
Unitatea exterioară funcționează, dar sistemul nu se răcește
Dacă ventilatorul exterior se rotește și sistemul pare să funcționeze normal, dar casa dvs. nu se răcește, compresorul poate funcționa, dar nu produce o compresie suficientă. Acest lucru poate fi cauzat de încărcarea scăzută a agentului frigorific, componentele interne uzate sau un compresor care se apropie de sfârșitul duratei de viață. Un tehnician poate verifica funcționarea compresorului prin măsurarea presiunilor de aspirație și de descărcare cu manometre - un compresor sănătos menține presiuni de descărcare de 200 până la 400 psi (în funcție de tipul de agent frigorific) și presiuni de aspirație de 60 până la 100 psi.
Zgomote puternice sau neobișnuite de la unitatea exterioară
Un compresor sănătos produce un zumzet scăzut constant. Clic, zgomot, zgomot, zgomot sau scârțâit de la unitatea exterioară sunt semne clasice ale problemelor compresorului. Un zgomot puternic la pornire, urmat de o declanșare a întreruptorului de circuit, indică adesea un compresor cu pornire grea care nu mai poate depăși rezistența inițială la compresie fără asistență electrică suplimentară - un kit de pornire greu poate rezolva temporar acest lucru, dar indică de obicei că compresorul este aproape de sfârșitul duratei de viață.
Unitatea exterioară declanșează întrerupătorul în mod repetat
Un compresor care consumă mult mai mult amperaj decât amperajul nominal la sarcină completă (FLA) va declanșa întrerupătorul. Această aspirație în exces indică rezistența mecanică internă - rulmenți uzați, pistoane gripate sau defecțiuni ale înfășurării electrice în interiorul compresorului etanș. Majoritatea compresoarelor AC rezidențiale sunt evaluate la 10 până la 20 de amperi; un compresor supraîncălzit sau blocat poate consuma între 30 și 50 de amperi înainte de declanșarea întreruptorului.
Unitatea exterioară zumzăie, dar ventilatorul nu se rotește (sau invers)
Dacă auziți unitatea exterioară bâzâind, dar nici compresorul, nici ventilatorul nu par să funcționeze, cea mai frecventă cauză este un condensator defect, mai degrabă decât compresorul în sine. Înainte de a condamna compresorul, solicitați întotdeauna unui tehnician să testeze condensatorul - o parte de la 15 la 50 USD care este adesea vinovată atunci când compresorul pare să nu pornească.
Pete de ulei sau scurgeri de agent frigorific în jurul unității exterioare
Petele de ulei de pe sau în jurul carcasei compresorului, sau de pe conductele de agent frigorific din apropierea orificiilor de conectare a compresorului, indică scurgeri de ulei de agent frigorific - ceea ce înseamnă, de asemenea, că agentul frigorific iese. Scurgerile de agent frigorific reduc eficiența sistemului și pot deteriora permanent compresorul dacă funcționează cu lubrifiere insuficientă. Prezența gheții pe conducta de aspirație sau pe unitatea exterioară în sine este adesea legată de încărcarea insuficientă a agentului frigorific cauzată de o scurgere.
Reparație vs. înlocuire: Ce să faceți când compresorul AC se defectează
Dacă trebuie să reparați sau să înlocuiți un compresor de curent alternativ defect, depinde de vechimea sistemului, de costul compresorului în raport cu o nouă unitate exterioară și de dacă tipul de agent frigorific este încă disponibil și accesibil. Următoarea comparație ajută la clarificarea deciziei:
| Scenariu | Acțiune recomandată | Motivul | Cost aproximativ |
| Sistem mai vechi de 5 ani, in garantie | Înlocuiți compresorul în garanție | Costul pieselor este acoperit; restul sistemului are o viață utilă lungă rămasă | Doar forță de muncă de 200 USD–600 USD |
| Sistem vechi de 5-10 ani, în afara garanției | Înlocuiți compresorul dacă costul este sub 50% din noua unitate exterioară | Sistemul are 5–10 ani de viață utilă rămasă; reparatia este economica | 900 USD – 1.800 USD piese și manopera |
| Sistem vechi de peste 10 ani, foloseste agent frigorific R-22 | Înlocuiți întreaga unitate exterioară sau întregul sistem | R-22 este eliminat treptat și este scump; noul sistem rambursează economiile de energie | 2.500 USD–5.500 USD înlocuire completă |
| Sistem vechi de peste 12–15 ani, orice agent frigorific | Înlocuiți sistemul complet | Înlocuirea compresorului la această vârstă nu este rentabilă; sistem complet aproape de sfârșitul vieții | 3.500 USD–8.000 USD sistem complet |
| Compresor blocat din cauza lipsei de lubrifiere (arsură) | Înlocuiți unitatea exterioară sau sistemul complet | Burnout-ul contaminează circuitul de agent frigorific; este necesară spălarea completă a sistemului | 2.000 USD–6.000 USD |
Tabelul 3: Ghid de decizie pentru repararea vs. înlocuirea unui compresor AC în funcție de vechimea sistemului, starea garanției și tipul de defecțiune.
Cum să protejați și să întrețineți compresorul de curent alternativ
Întreținerea proactivă este cel mai eficient mod de a prelungi durata de viață a compresorului dvs. de AC - un compresor bine întreținut într-un sistem bine întreținut poate dura 15 până la 20 de ani, în timp ce unul neglijat poate eșua în 8 până la 10 ani.
- Păstrați unitatea exterioară curată și curată. Bobina condensatorului din jurul compresorului trebuie să fie capabilă să disipeze căldura eficient. Îndepărtați anual frunzele, iarba tăiată și resturile din interiorul dulapului. Tăiați vegetația pentru a menține cel puțin 18 până la 24 de centimetri de spațiu liber pe toate părțile. Un condensator înfundat forțează compresorul să lucreze mai mult și să funcționeze mai fierbinte, accelerând uzura.
- Schimbați filtrele de aer din interior în mod regulat. Un filtru de aer de interior murdar restricționează fluxul de aer prin serpentina evaporatorului, provocând înghețarea serpentinei. Când gheața blochează fluxul de agent frigorific, compresorul primește agent frigorific lichid în loc de vapori - o condiție numită slugging lichid care poate distruge supapele compresorului în câteva minute. Înlocuiți filtrele la fiecare 1 până la 3 luni, în funcție de utilizare și de condițiile casnice.
- Programați perfecționări profesionale anuale. Un tehnician HVAC calificat ar trebui să inspecteze sistemul în fiecare primăvară înainte de sezonul de răcire. Verificările cheie includ măsurarea presiunii agentului frigorific, testarea sănătății condensatorului, inspectarea conexiunilor electrice, măsurarea consumului de amperaj al compresorului și curățarea bobinei condensatorului. Detectarea timpurie a unui condensator slab sau a unei încărcături scăzute de agent frigorific poate preveni deteriorarea compresorului, care ar costa de 10 până la 20 de ori mai mult pentru rezolvare.
- Nu restricționați niciodată fluxul de aer în jurul unității exterioare. Nu construiți incinte, nu plantați arbuști și nu așezați obiecte direct pe unitatea exterioară. Compresorul și serpentina condensatorului necesită un flux de aer nerestricționat pentru a respinge căldura. Restricționarea acestui flux de aer crește presiunea de condensare, ceea ce crește sarcina de lucru a compresorului și temperatura de funcționare - ambele contribuie majore la defecțiunea timpurie a compresorului.
- Abordați cu promptitudine scurgerile de agent frigorific. Incarcarea scazuta a agentului frigorific este una dintre principalele cauze ale defectarii compresorului. Când lichidul frigorific este scăzut, compresorul primește o lubrifiere insuficientă (uleiul frigorific circulă împreună cu agentul frigorific) și se poate supraîncălzi. Dacă sistemul dumneavoastră nu răcește la fel de bine ca odinioară, solicitați unui tehnician să verifice nivelurile de agent frigorific înainte ca situația să se degradeze până la deteriorarea compresorului.
- Luați în considerare un kit de pornire greu pentru sisteme mai vechi. Dacă compresorul dumneavoastră dă semne de pornire grea – zgomot puternic la pornire, întrerupătoare declanșate, pornire întârziată – un tehnician HVAC poate instala un kit de condensator de pornire greu de la 50 la 150 USD care oferă un impuls suplimentar electric la pornire. Acest lucru nu rezolvă o problemă mecanică de bază, dar poate prelungi durata de viață utilă a unui compresor învechit prin reducerea stresului de pornire asupra componentelor interne.
Întrebări frecvente: Locația și funcționarea compresorului de curent alternativ
Rezumat: Găsirea și protejarea compresorului pe unitatea dvs. AC
Compresorul unei unități de curent alternativ este întotdeauna amplasat în unitatea exterioară — în centrul de jos al dulapului în sistemele centrale split și mini-split-urile și în secțiunea exterioară din spate a unităților cu ferestre. Este cilindrul mare de metal sigilat conectat la două linii de agent frigorific și este componenta cea mai semnificativă din punct de vedere mecanic și financiar din orice sistem de aer condiționat.
Cunoașterea unde este amplasat compresorul și ce face acesta vă permite să luați decizii mai bune atunci când sistemul dumneavoastră nu se răcește corespunzător, când vin zgomote neobișnuite de la unitatea exterioară sau când un tehnician recomandă o reparație costisitoare. În cele mai multe cazuri, răspunsul corect la problemele compresorului depinde de vechimea sistemului dumneavoastră și de costul relativ al reparației față de înlocuirea completă a sistemului - utilizați instrucțiunile din acest articol ca punct de plecare pentru acea evaluare.
- Locație: întotdeauna în unitatea exterioară, jos în centru sub ventilatorul condensatorului
- Aspect: recipient metalic sigilat cilindric sau în formă de cupolă, gri închis sau negru
- Conectat la: o linie mare de aspirație izolată și o linie de lichid mai mică
- Durata de viață tipică: 12 până la 15 ani cu întreținere adecvată
- Cost de înlocuire: 800 USD până la 2.800 USD, inclusiv forța de muncă
- Cea mai frecventă cauză a nepornirii fără compresor: condensator de funcționare eșuat (reparație de la 50 USD la 250 USD)
- Întreținerea anuală reduce riscul de defectare a compresorului în mod semnificativ